Help Center
  • 👋Welcome to Hireforce
  • Getting Started
    • Access to Hireforce
    • Onboarding
      • Admin
      • Recruiter
      • Interviewer (Event Attendee)
      • Hiring Manager
    • Settings
      • Account
      • Workspace
        • General
        • Careers Page
          • Basic Career Page Builder
          • Advance Career Page Builder
          • Term And Condition
          • DNS Settings In The Domain Provider
        • Departments
        • Members
        • Locations
        • Plans
      • Recruiting
        • Company Status
        • Disqualification Reasons
      • Templates
        • Email Templates
        • Hiring Pipelines
  • Product Guides
    • Dashboard
    • Job Management
      • Jobs Listing
      • Create Jobs
    • Candidate Management
      • Add Candidates
      • Candidate Listing
      • Candidate Processing
      • Client Submission
    • Interview
      • Schedule An Interview
      • Event Management
      • Submit Feedback
      • Interview Kits
        • Interview Kits Setting
        • How To Use The Interview Kits?
    • Report
      • Overview
      • Time to Hires
      • Team Productivity
      • Hiring Funnel
    • Custom Fields
      • Direct Employer
      • Agency
      • Additional Fields
    • Requisition
      • Setting
      • Requisition Status
      • How to use it?
    • Career Hub
      • Career Hub Setting
      • Career Hub Display
    • Security
      • How to set up SSO on Hireforce?
      • Session Management
    • Recommendation
      • Recommendation at Job
      • Recommendation at Candidate Profile
    • Tags
    • Profile Template
      • Settings
      • Create Template
      • Download CV Template
    • Company Management
      • Company Listing
      • Create Companies
    • Contact Management
      • Contact Listing
      • Create Contacts
    • Placement Management
      • Placement Listing
      • Create Placements
    • Talent Pools
      • Talent Pools Listing
      • Add Candidates To Talent Pools
    • Tasks
    • Tool
    • Notes
    • AI Power
      • AI Parser
      • AI Writer
    • Notifications
    • Integration
      • Sync Calendar
        • Google Calendar
        • Outlook Calendar
        • Apple Calendar
  • Collaborate with 3rd parties
    • Candidate Experience
  • Others
    • FAQ
      • 1. Why can't I log in to our company tenant on Hireforce?
      • 2. How to sign out of Hireforce?
      • 3. Why is the time on Hireforce incorrect?
      • 4. May I change the interface language on Hireforce?
      • 5. Why was the job link I shared from the Referral hub displayed in Japanese?
      • 6. How can I contact support if I have a question?
      • 7. How can I switch between multiple organizations?
      • 8. How can I effectively manage and track candidates from multiple job boards in one place?
      • 9. How can I streamline communication between my hiring team to avoid delays in the hiring process?
      • 10. How can I gather and manage feedback from multiple interviewers efficiently?
      • 11. How to perform bulk actions in job or in candidate?
      • 12. Why Can’t I Accept the Invitation from Hireforce?
      • 13. What is different between the Profile tab and the Job-Related tab?
      • 14. Workspace Member vs. Career Hub Member
    • Campaigns
      • Hireforce Year-End Deals Terms and Conditions
  • ACADEMY
    • Direct Tenant
    • Agency Tenant
Powered by GitBook
On this page
  • Create A New Requisition
  • Requisition Status
  • Approve and reject a requisition

Was this helpful?

  1. Product Guides
  2. Requisition

How to use it?

Last updated 7 months ago

Was this helpful?

Create A New Requisition

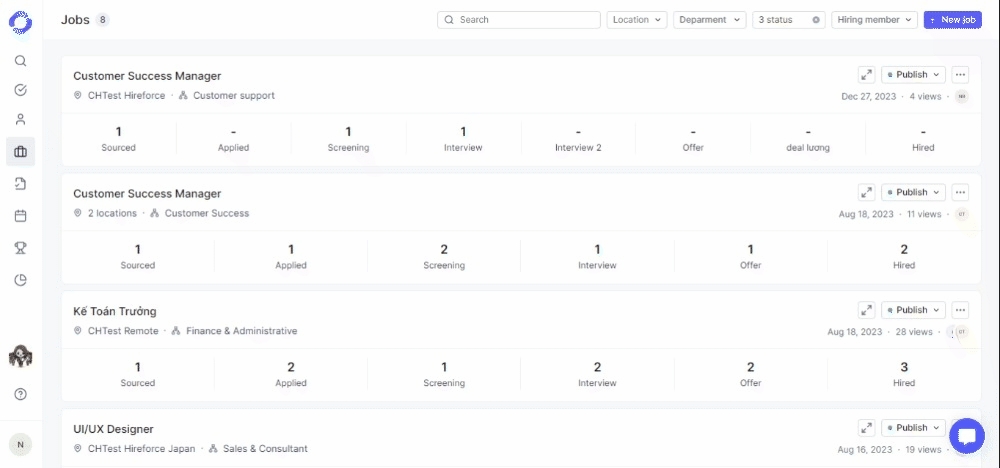
After completing the setting for requisition (by Admin role), you can start to create the Requisition. A requisition is like a Job but it requires more information as:

  • Reason: New headcount or Replacement

  • Approval flow: select a flow that was set up

To create a requisition:

1. Select the Requisitions icon on the left menu.

2. Click the +New requisition button in the upper right.

3. Fill out the required fields:

  • Hiring manager/ Owner: the list includes any user roles who have requisition permission (1 or All)

  • Creator: is the current user who created and submitted the requisition. The creator and Owner may be different in case Creator selected other users in the field Requisition Owner.

  • Select Approval workflow.

  • Complete the requisition creation by clicking:

    • Submit: Requisition is in Pending status and waiting for approval

    • Save Draft: Requisition is in Draft status
Requisition Status

A requisition will go through different statuses. Available requisition actions will vary based on the requisition status so it's essential to understand what each status signifies.

Here are all the requisition statuses in Hireforce:

Requisition status
Description

When creating a requisition for any job, you can fill out the details and save it as a draft. You can edit later and submit it for approval when you're ready.

A requisition will enter the pending status when it successfully submitted. It will remain pending until all approval groups approve it.

The approvers get notified by email once a requisition needs reviews and they can approve the details or reject them with a note if an update is required.

A requisition will enter the canceled status when it was closed without hiring a candidate.

A requisition will enter the rejected status once there's one approver giving rejection.

The approver will be prompted to provide a rejection reason which will be shared with all requisition stakeholders so they can update and re-submit for approval.

A requisition will enter the approved status when it is full approved by all required approvers. Once requisition is approved, the Requisition owner will be notified.

This requisition status is a step after successfully created job from approved requisition.

Approve and reject a requisition

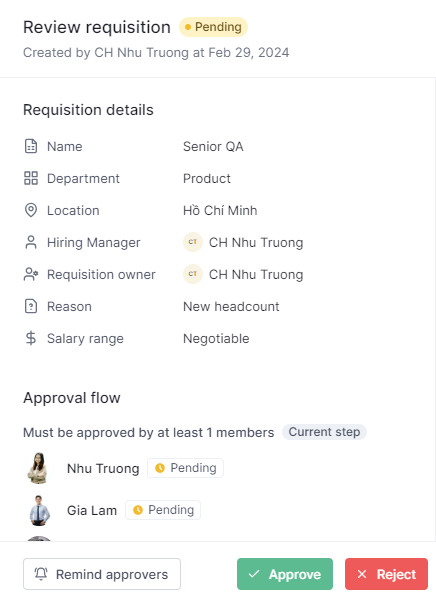
When a requisition is submitted for review, all approvers will be notified in order of the approval flow about the pending approval request.

Approvals for requisitions are sequential, meaning the approval request will be first sent to members of the 1st approval group. When all approvals required in the 1st group are fully signed - off, only then it will be sent to the members of the 2nd approval group and so on.

To approve or reject a requisition:

  1. To review the requisition, click on the notification in the email or go to the Requisition page and click on the Requisition that waiting for approval.

  2. Upon opening the requisition, review everything that can be seen in the Requisition details.

  3. Once reviewed, click Approve or Reject at the bottom of the page depending on what’s appropriate. If you decide to reject the requisition, you'll need to explain your decision. Your message will be visible to all team members who have access to the requisition.
Archive requisition

A requisition will enter archive status when it is closed without hiring a candidate.

Only change the archive status of the requisition from Approved and Rejected status by selecting Archive requisition in the More button.
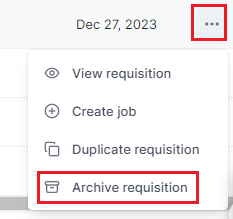
After the Requisition is approved, you can

create the Job with approved requisitions.