> For the complete documentation index, see [llms.txt](https://help.hireforce.io/llms.txt). Markdown versions of documentation pages are available by appending `.md` to page URLs; this page is available as [Markdown](https://help.hireforce.io/product-guides/profile-template/create-template.md).
# Create Template
{% hint style="info" %}
Create New Template in **Profile Template** section
**- Add Sections:** Organize your template by adding the appropriate sections.
**- Add Fields to Each Section:** Populate each section with the relevant fields.
**- Review and Customize:** Review the template to ensure it meets your needs, and make any necessary customizations.
{% endhint %}
Go to the **Settings** page, and select the **Profile Template** section:
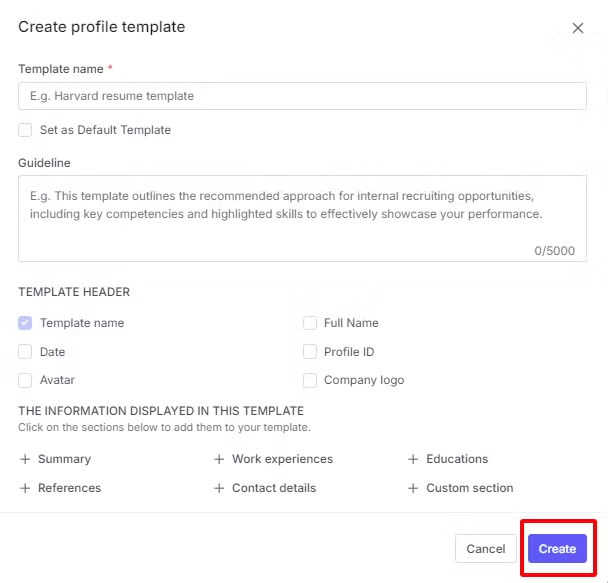
1. Click the **+New template** button to open the template builder.
2. **Input the information:**
* **Template name:** helps user easily identify and organize different templates based on their specific purpose or content.
* **Guideline** provide the employee how to prepare their resume the best to win recruitment opportunities as soon as possible. *As an Admin, if you input Guideline, it will show button View Guideline in the Completion scorecard.*
* **The template header** included **Full Name** and **Photo** as default, you can customize it by selecting the fields you want to display on the template.
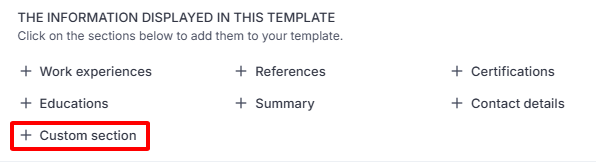
* **The Information Displayed In The Template**: Select the existing Section or add an additional section:
* There are 6 existing fixed sections.
* You can add additional custom sections by clicking on **Custom Section.**
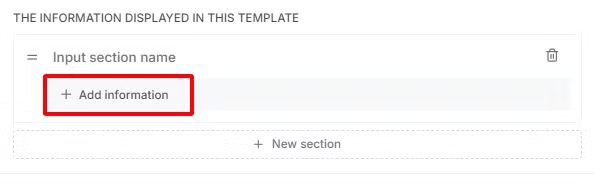
* Add a section:
* If it's an additional section, input the Section Name.
* Click the **Add Information** button to include the fields you want to display in this section.
* **Add company name as a watermark**: The name you provide in your Workspace (General Setting) will automatically be used as a watermark on your CV. By default, the CV will not have a watermark. Please check this box if you'd like to add a watermark to your CV
{% hint style="info" %}
* Drag and drop to reorder the section list or fields list.
* Click the **Trash** button to delete a section or field.
{% endhint %}
3. Click the **Create** button to complete.